Photographing Historic Architecture - A Day Out With Clive Tanner MPAGB FRPS
by Chris Rigby
“Ask yourself ‘why am I taking this photograph’ - a photograph taken for a reason has value”.
Upon arrival at your chosen location take time to walk around and enjoy the artwork of craftsmen from days gone by, the intricate wooden carvings of doors, screens, and furnishing styles, the stone masons’ sculptures which adorn both the exterior and interior of the building, the marble monuments, the metal craftsmanship of creatively shaped door fittings and turned brass candle holders, the colourful artwork of the glaziers’ pictorial window creations, the geometric forms of medieval tiles, the beautiful patterns and colours of the fabrics, the fine leather bindings of literature, and not least of all the historical records displayed on many of these materials. All combine to create a location crying out to be recorded before it may be lost through time, thus depriving future generations of enjoying what you see today; a valuable art form. A historic building is a home of beautiful arts and crafts and worth recording.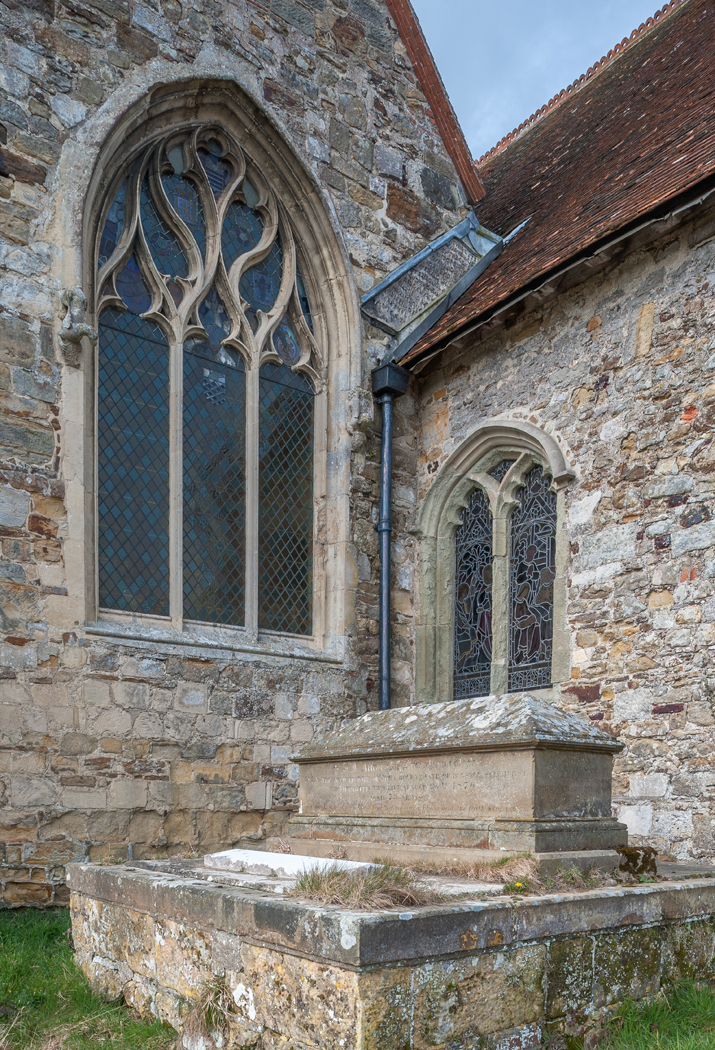
As you walk around make a note, mental or otherwise, of suitable subjects; identifying also additional items of interest which would complement the scene without making it too cluttered. Archways make good framing elements, and vertical pillars are useful ‘end stops’, as are the vertical stone divisions in a window. When framing a subject which includes both floor and ceiling carefully consider what is best to include of the ceiling and what is best to include of the floor. Ledger grave slabs in a floor make useful lead-in lines. Door openings, screens, and alter rails etc can be utilised to ead the viewers eye through the frame to the main subject, as can a bible on a lectern which would also serve as an item of foreground interest.
Look for textures when considering a scene; wood grain, marble veins, stone chiselling grooves, etc, and if you are lucky, you may find some of the medieval stone masons’ marks. Search for items of colour which could complement the main subject, many churches for example often contain colourful kneelers and banners.
Capturing an image from a position at a right angle rarely gives the best results. Endeavour to achieve depth to the image by including diagonals to improve the dynamics of the scene, particularly when photographing subjects in a corner where there will be diagonals of different direction which can also serve as lead-in lines to the main subject. Don't be afraid to include shadows in the scene which can also direct the viewers eye. When appropriate, consider positioning the camera at an angle such that it includes the top of the main subject, mayberevealing the inside lip of a cup or the far side of a bowl, or the brass positioned on top of a chest tomb, etc. Sometimes it is wise to get very close to a subject and to feature large in the frame what is most important.
Before capturing the stone artwork of a plain glass window consider adopting a position which would include an interesting view beyond. A view through a plain glass window which includes another historic building or foliage will be far more interesting than a view of a modern building or a bland sky. Whilst considering a scene which includes a coloured glass window study the varying colours in the window and consider how they complement each other, and what effect these colours will have on the main subject.
When photographing interior architecture natural daylight is usually the best and most convenient option. As you walk around the interior of a building be aware of how the lighting will change during the course of the day and how it will affect what you intend to photograph. For example, churches are invariably constructed on an east to west axis with the alter at the eastern end of the church. So during early morning the alter would be back-lit, and as the day progresses the lighting of the alter would change in varying degrees to back/side lighting, to side lighting, to side/front lighting, to front lighting, depending of course on the position of the windows. At some locations you may be offered a choice of the building’s  supplementary lighting, and at other locations there may be no choice at all with the building’s lighting permanently illuminating the interior. Identify light sources and their effect on the main subject and the overall scene. Look for colour casts which can't be digitally adjusted and visualise their effect on the main subject and the overall image. Consider the alternatives of a ‘black and white’ digital image or a coloured digital image; or possibly a digital image which would be equally served by both ‘black and white’ and colour. ‘Black and white’ images emphasise lines, shapes, and textures, and eliminate unwanted colour casts which can’t be corrected with the white balance slider in a digital editing programme. The lighting values of interiors often vary immensely, such that one component of a digital image will have a different light temperature and tint value than other areas of the image in addition to a different camera exposure requirement. Consequently, it is useful to take a series of frames of varying exposure values such that an acceptable image can be produced in a photo editing programme as an HDR (high dynamic range) image, or alternatively, in the image editing programme selections can be made of various components of the image with the white balance temperature and tints suitably adjusted, copied, and then pasted on to a master ‘background’ image which will then contain a scene of balanced lighting values.
There can be so much to photograph, and a common mistake could be an attempt to capture everything in a single photograph, if that is how you initially think you see it; but think again, your eyes have quickly moved throughout the scene from subject to subject. Each component of the building’s architecture is an interesting and suitable subject in itself and should be treated as such. Whilst an overview may serve the purpose of an overall composition it will not allow the viewer to enjoy each component of the scene to the same exert as would a series of photographs; a series of photographs could be displayed in panel form, within an album, as an audio visual presentation, or as an exhibition.
A simple camera is all that is required to enjoy photographing historic architecture. However, more sophisticated photographic equipment will allow the photographer to capture a greater selection of quality images. A camera with the facility of live-view and a back-screen virtual horizon will be of great benefit to accurate focusing and to levelling the camera, and a sturdy tripod is almost essential for photographing interior subjects where low levels of lighting will demand longer
exposures. A geared tripod head will enable the photographer to easily make fine tuning adjustments to the camera position across each axis whist composing a scene. Wide angle lenses of say 24mm focal length are particularly useful for photographing building interiors, and a ‘tilt and shift’ lens is a great aid to avoid converging verticals in the final image. A 24mm lens also offers a greater depth of field, and when photographing exterior architecture in a limited space it may be essential for including the whole of the building within the viewfinder. To maximise the depth of field offered with a wide angle lens, say to capture the interior length of a building apparently in focus, a lens aperture of say f/14 or f/16 should be selected.
A good blend of light, shadows, and tones can be achieved with a HDR (high dynamic range) editing programme and the Efex Pro 2 programme offers a choice of six grades of HDR effects to choose from, with the most ideal being the default  setting. When processing a digital image in the Lightroom 5 editing programme a recommendation would be to commence with the Highlights Slider set to -100 and the Shadows Slider set to +100, and to then adjust the exposure; adding contrast, clarity, vibrance, and saturation to suit before making a final adjustment to the Highlights Slider and the Shadows Slider. The Black and White Points should be set on the histogram chart and sharpening to values of 30 to 50 are more desirable as they produce less digital noise than higher settings, and finally the sections of ‘lens profile correction’ and ‘remove chromatic aberration' should be included. Contrast should be applied with consideration during processing and there should not be too much contrast or too little contrast; the same amount of contrast should not be applied to every image because the amount of contrast required depends on the lighting value of the scene. Contrast and brightness can also be used to draw the viewers attention to the main subjects in the photograph, and could also be considered along with saturation to give a sense of depth to the scene. In order to achieve precise image results the camera and computer monitor should be profiled, and the computer monitor and printer should be profiled.
Maintaining our historic architecture requires vast financial resources which are not always readily available, and a good photographic record will sometimes be the only way our heritage can be preserved for future generations to enjoy; a good reason to take a photograph, which will be a photograph of value.
Clive Tanner offered his services as a mentor sharing his valuable wealth of knowledge and experience to help improve my photography skills. The members of a Camera Club collectively make up a huge resource of photographic knowledge, and maybe club members would like to consider working with the management committee in producing a register of member mentors and their particular skills, who like Clive, would be willing to share their knowledge and assist fellow members.
Chris Rigby